When building an agent with Azure AI Foundry, you’ll often need to look back at the conversation so far. Whether you’re debugging, showing it for reference, or implementing agent “memory” fetching thread message history is essential.
fromazure.ai.projects.aioimportAIProjectClientfromazure.identity.aioimportDefaultAzureCredentialclient=AIProjectClient(endpoint="Endpoint of your Azure Ai Foundry project",credential=DefaultAzureCredential())
Get thread ID
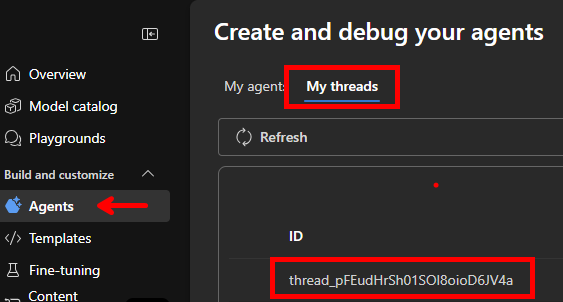
To fetch history, you need a thread ID. You can either persist it when creating threads in code or find it in the Azure AI Foundry portal:
List all messages in a thread
The simplest way is to iterate over all messages with the async list method:
The limit parameter is confusing. It does not cap the total number of messages returned—it only controls how many items are retrieved per API call. For example, limit=3 still fetches the entire history, just in smaller batches.
To truly process a limited number of messages, use paging and break early:
messages=agents_client.messages.list(thread_id=thread_id,limit=3)fori,pageinenumerate(messages.by_page()):print(f"Items on page {i}")formessageinpage:print(message.id)# break after first page if only X items are needed
this will produce something like this:
Items on page 0
msg_1
msg_2
msg_3
Items on page 1
msg_4
msg_5
msg_6
Items on page 2
msg_7
If you only want the first N messages, you can exit the loop after processing the desired count.
Entity Framework (EF) is a powerful Object-Relational Mapping (ORM) framework for .NET applications. It simplifies data manipulation, but without proper query optimization, EF can lead to suboptimal performance. This post explores two examples of EF query optimization in C# to enhance application efficiency and response times.
Making queries better
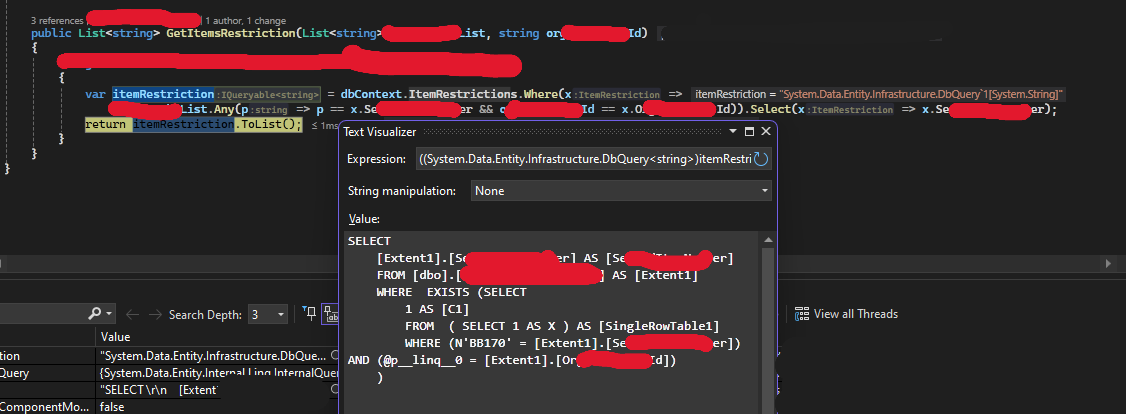
In the first example, the query is made with Any(), but EF interprets the query more complexly than it should and generates suboptimal SQL code for our case.
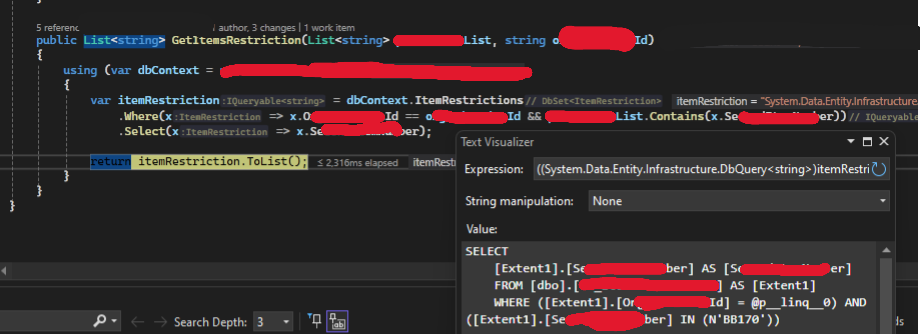
After checking the SQL value that shows what the EF will execute against the DB, we can experiment with different ways to write the query. Rewriting this example to Contains() generated a much simpler SQL for our case, hence better performance.
Takeaway: Take a look at the SQL the EF generates from the queries that you use in order to gain performance upgrades.
Best Practices for Query Optimization in Entity Framework
Use Projections: Avoid retrieving entire entities if only specific fields are needed. Use .Select() to retrieve only the necessary data.
Filter at the Database Level: Whenever possible, apply filters directly in the query rather than retrieving data and filtering in memory.
Be Mindful of Lazy Loading: Lazy loading can cause performance issues due to multiple round trips to the database. Consider eager loading (using .Include()) when you know related data will be needed.
Use AsNoTracking for Read-Only Data: If the data you’re retrieving won’t be updated in the current context, using .AsNoTracking() can improve performance because EF doesn’t need to track changes.
Benchmark and Profile: Always measure performance changes after optimizations. Use profiling tools to identify slow queries and bottlenecks.
Călătoria într-o destinație exotică poate fi o aventură palpitantă. De la explorarea unor culturi noi până la descoperirea unor locuri ascunse, există atât de multe lucruri de așteptat. Totuși, o provocare neașteptată poate să îți complice planurile: menținerea conexiunii la rețeaua mobilă. În unele țări, tipurile de rețea disponibile (de exemplu, 5G, 4G sau 3G) pot diferi de ceea ce ești obișnuit acasă. Cunoașterea modului de ajustare a setărilor de rețea ale dispozitivului tău te poate scuti de frustrarea de a rămâne fără semnal.
Înțelegerea compatibilității rețelelor
Operatorii de telefonie mobilă din întreaga lume operează pe benzi și tehnologii diferite. De exemplu:
Unele regiuni se bazează încă pe 3G, în timp ce altele sunt complet echipate cu 5G.
Operatorul tău s-ar putea să nu aibă acorduri cu furnizorii locali pentru anumite tipuri de rețea.
Anumite benzi utilizate în destinația ta ar putea să nu se potrivească cu cele suportate de dispozitivul tău.
Aceste variații înseamnă că setările tale de rețea implicite, proiectate pentru țara ta de origine, s-ar putea să nu funcționeze fără probleme în străinătate.
Cum să ajustezi setările de rețea
Când te afli fără semnal într-o destinație exotică, urmează acești pași pentru a rezolva problema:
Accesează setările de rețea
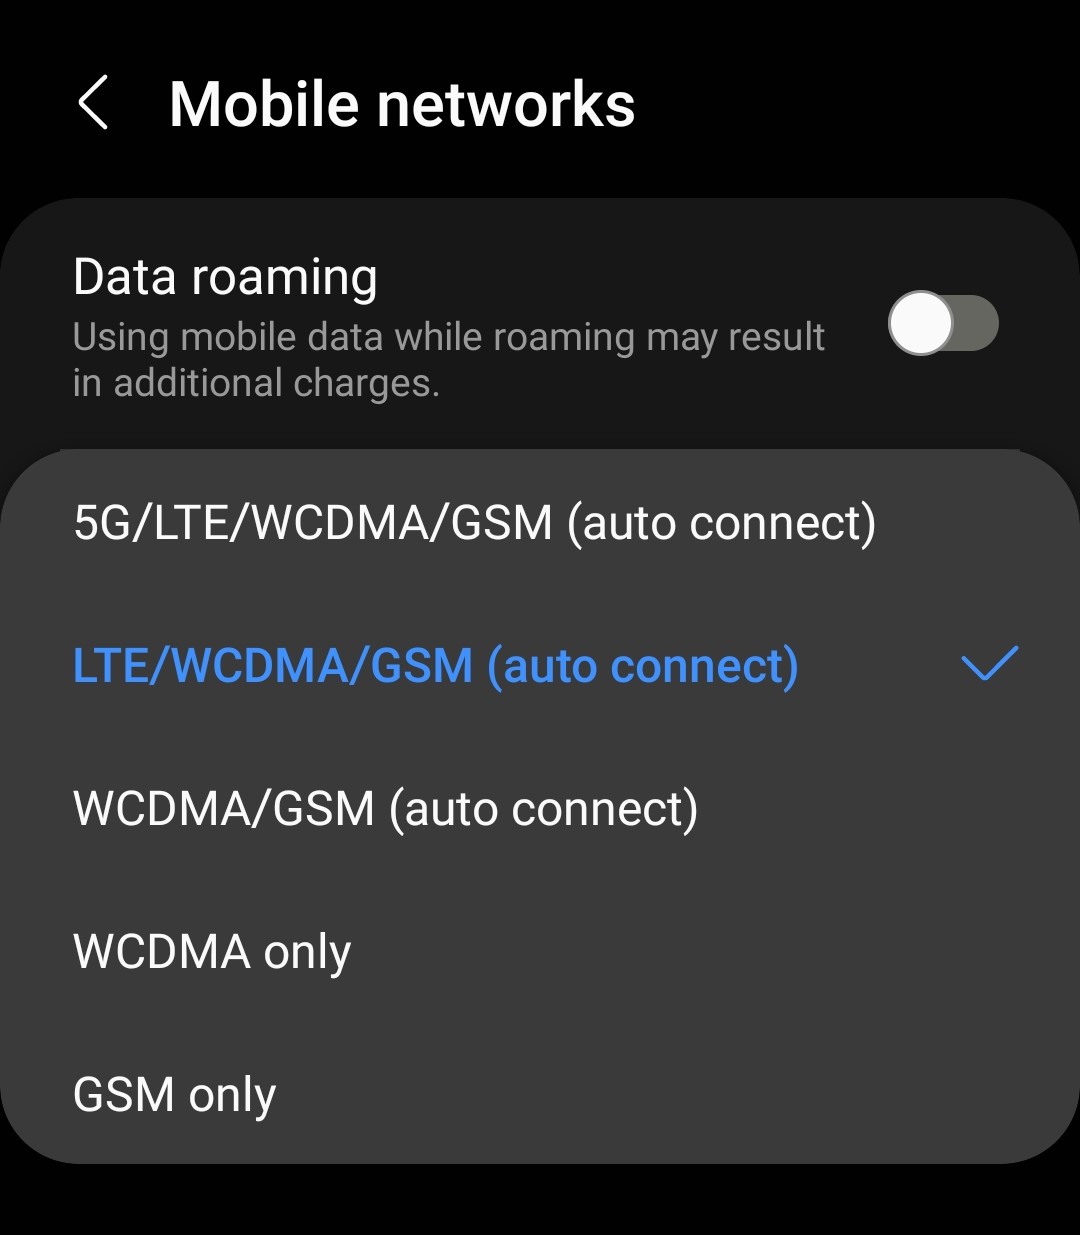
Pe majoritatea smartphone-urilor, accesează Setări > Rețele mobile sau Conexiuni > Mod rețea.
Schimbă tipul preferat de rețea
Dacă dispozitivul tău este setat să prioritizeze 5G, comută la 4G sau 3G. Unele dispozitive îți permit să selectezi opțiunea „Auto” sau să alegi manual între opțiunile disponibile.
Repornește dispozitivul
Uneori, o simplă repornire este tot ce ai nevoie pentru a te reconecta la o rețea compatibilă.
Selectează manual o rețea
Accesează Setări > Rețele mobile > Operatori de rețea și scanează rețelele disponibile. Alege una care oferă cel mai puternic semnal.
Activează roamingul
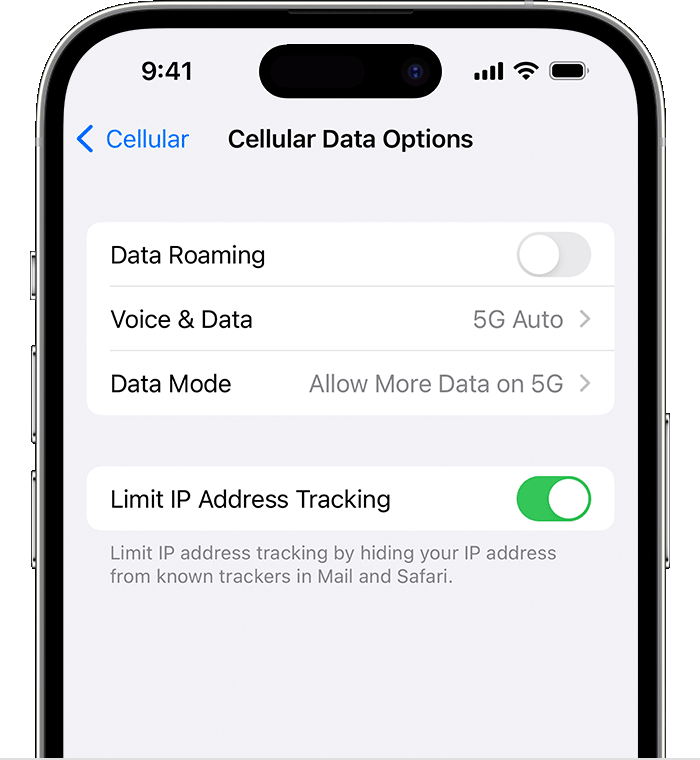
Dacă planul tău include roaming internațional, asigură-te că acesta este activat în Setări > Date mobile > Roaming de date.
De ce este important acest lucru
Rămânerea conectat nu ține doar de comoditate; este adesea o problemă de siguranță. Fie că ai nevoie să te orientezi folosind hărțile, să contactezi persoane dragi sau să ceri ajutor în caz de urgență, o conexiune mobilă fiabilă este esențială. Înțelegând și ajustând setările de rețea, poți călători fără întreruperi inutile.
Sfat util: Înainte de călătorie, verifică împreună cu operatorul tău rețelele suportate și acordurile de roaming în țara de destinație. Unii operatori oferă aplicații sau servicii care simplifică aceste ajustări.
Un exemplu specific este operatorul Digi (RCS-RDS). Când călătorești, este posibil să observi că, deși rețelele sunt disponibile, telefonul tău nu se conectează la niciuna. În acest caz, este esențial să setezi manual tipul de rețea și să aștepți să vezi dacă se conectează. De exemplu, încearcă să comuți la 3G dacă 4G nu funcționează. Uneori, această abordare de încercare și eroare este necesară pentru a găsi o rețea compatibilă.
Concluzie
Călătoria într-o țară mai exotică nu înseamnă că trebuie să pierzi legătura cu lumea digitală. Fiind proactiv și știind cum să ajustezi setările de rețea, poți să te asiguri că vei rămâne conectat, indiferent unde te duc aventurile tale. Călătorii plăcute!
Last week, on 2024.05.14, Google updated their Gemini AI models and conducted a demo. They also released a short document titled “Prompting Guide 101”. While the document covers a broad range of topics and is not specifically focused on software development, it provides useful information on how to use prompts effectively, with examples included.
This prompting guide was initially created for Gemini, but its principles are applicable to all GPTs, such as ChatGPT.
Quoting directly from their freely available PDF:
Taking it directly from their free PDF
Writing effective prompts
There are four main areas to consider when writing an effective prompt. You don’t need to use all four,
but using a few will help!
Persona
Task
Context
Format
Here is an example of a prompt using all four areas that could work well in Gmail and Google Docs:
You are a Google Cloud program manager. Draft an executive summary email to [persona] based on
[details about relevant program docs]. Limit to bullet points.
Here are quick tips to get you started with Gemini for Workspace:
Use natural language. Write as if you’re speaking to another person. Express complete thoughts in
full sentences.
Be specific and iterate. Tell Gemini for Workspace what you need it to do (summarize, write, change the
tone, create). Provide as much context as possible.
Be concise and avoid complexity. State your request in brief — but specific — language. Avoid jargon.
Make it a conversation. Fine-tune your prompts if the results don’t meet your expectations or if you believe
there’s room for improvement. Use follow-up prompts and an iterative process of review and refinement to
yield better results.
Other important part of the document:
Leveling up your prompt writing
This guide is meant to serve as inspiration, but the possibilities are nearly endless with Gemini for Google
Workspace. Try these additional tips to build on your prompt-writing skills.
Break it up. If you want Gemini for Workspace to perform several related tasks, break them into
separate prompts.
Give constraints. To generate specific results, include details in your prompt such as character count limits
or the number of options you’d like to generate.
Assign a role. To encourage creativity, assign a role. You can do this by starting your prompt with language
like: “You are the head of a creative department for a leading advertising agency …”
Ask for feedback. In your conversation with Gemini at gemini.google.com, tell it that you’re giving it a project,
include all the details you have and everything you know, and then describe the output you want. Continue the
conversation by asking questions like, “What questions do you have for me that would help you provide the
best output?”
Consider tone. Tailor your prompts to suit your intended audience and desired tone of the content.
Ask for a specific tone such as formal, informal, technical, creative, or casual in the output.
Say it another way. Fine-tune your prompts if the results don’t meet your expectations or if you believe
Be sure to check their guide, because they have a lot of examples!